(and Why This Method Works)
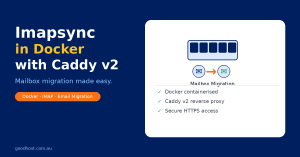
Imapsync is a powerful tool for syncing mailboxes from one IMAP server to another. This guide will show you how to set it up in a Docker container and securely serve its web interface using Caddy v2 as a reverse proxy with HTTPS.
✅ What You’ll Achieve
- Run
gilleslamiral/imapsyncin Docker - Securely access Imapsync via a subdomain (e.g.,
https://imapsync.yourdomain.com) - Automatically provision an SSL certificate with Let’s Encrypt using Caddy v2
- Use Docker internal networking to keep things clean and secure
🛠️ Prerequisites
- A Docker host with Portainer (or Docker CLI)
- A domain name (e.g.,
yourdomain.com) - DNS pointing
imapsync.yourdomain.comto your Docker host’s public IP - Caddy v2 running as a Docker container with its config volume mounted
🧱 Step 1: Create a Docker Network
We’ll use a shared Docker network (caddy-net) to allow containers to talk to each other by service name.
docker network create caddy-net🐳 Step 2: Deploy Imapsync in Docker
Use this configuration in Portainer (or a docker run command):
✅ Key Points
- The container listens on ports
8080(HTTP) and8443(HTTPS) - You don’t need to expose those ports to the host if you’re using Caddy
- The container name (or alias in the network) will be
imapsync
Example CLI:
docker run -d
  --name imapsync
  --network caddy-net
  gilleslamiral/imapsync
In Portainer:
- Set the container name:
imapsync - Network: attach to
caddy-net - You do not need to publish ports (unless you want external access for testing)
🌐 Step 3: Update Caddyfile
Here’s the Caddy v2 configuration block:
imapsync.yourdomain.com {
    reverse_proxy https://imapsync:8443 {
        transport http {
            tls_insecure_skip_verify
        }
    }
    encode gzip
    tls you@example.com
}
✅ Why This Works
https://imapsync:8443: We proxy over HTTPS to the container (internal Docker DNS resolvesimapsync)tls_insecure_skip_verify: The container uses a self-signed cert (fordocker.lamiral.info), so we skip verificationencode gzip: Enables compressiontls you@example.com: Required for automatic SSL provisioning with Let’s Encrypt
🔄 Step 4: Reload Caddy
If running via CLI:
docker exec -it caddy caddy reload --config /etc/caddy/CaddyfileOr just restart the Caddy container:
docker restart caddy🧪 Step 5: Test It
Visit your site:
https://imapsync.yourdomain.comYou should see the Imapsync web interface, secured with HTTPS via a valid Let’s Encrypt cert.
🔍 Common Issues & Fixes
| Problem | Solution |
|---|---|
502 Bad Gateway | Usually caused by Caddy failing TLS verification — make sure tls_insecure_skip_verify is set. |
| Docker DNS not resolving | Ensure both Caddy and Imapsync are attached to caddy-net. |
| SSL errors | Check that your subdomain points to your server and port 443 is open. |
🎓 Why Use This Method?
- Security: Imapsync exposes an HTTPS interface internally; we tunnel it through Caddy with a trusted cert.
- Simplicity: Caddy handles HTTPS, reverse proxy, and cert renewal automatically.
- Isolation: Only Caddy talks to the internet. Everything else stays inside Docker.
If you’d like this written up as a Markdown file, or ready to publish on a site like a knowledge base or blog, let me know!